No products in the cart.

What’s new in Bifrost

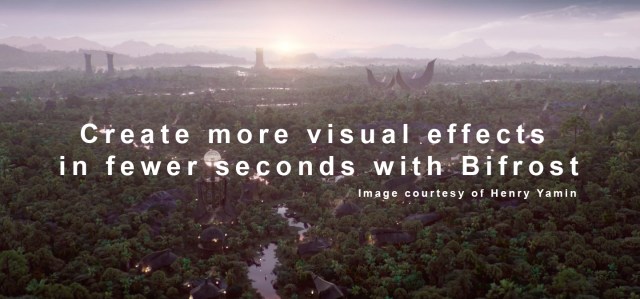
Improve collaboration and deliver highest-quality production values in fewer seconds with Bifrost, Maya’s visual programming environment.

This release brings you a complete overhaul of viewport volume rendering, using new “NanoVTT” technology, as well as MPM Gel, an exciting new capability that simulates substances such as soft-serve ice cream. It also introduces native support for Apple Silicon for incredible performance that will take your art further.


Deliver highest-quality production values:

You can rely on Bifrost to produce content faster and more efficiently to meet growing demands. Maya’s visual programming environment handles huge, complex files, and libraries without slowing down productivity or causing an onset of delays and missed deadlines.

Improve collaboration:

You need a tool for non-destructive, collaborative editing to tackle complex projects. Bifrost-USD enables new content, from different artists, departments, and studios, to be added non-destructively to a scene.

Improve creativity, aesthetics, and quality:

The industry is shifting from quantity to quality of productions, increasing the importance of pixel-perfect visual effects. Bifrost offers the option of building custom effects or quickly getting 90% of the way to a final effect with pre-built graphs so that you can deliver detailed, natural looking effects like smoke, fire, explosions, sand or now, no matter their level of technical expertise.


What’s new in Bifrost


Apple Silicon Support

Bifrost now runs fully natively on both Apple Silicon and Intel Macs from a universal binary to help you achieve a new level of performance. Bifrost’s just-in-time compiler, Amino, also generates native ARM64 code allowing your graphs to be compiled into native code for Apple Silicon. The SDK has also been updated to allow building plugins as Universal binaries.

NanoVTT Viewport Volume Rendering

This release introduces NanoVTT viewport volume rendering. Bifrost has a highly efficient, state-of-the-art volume representation called the “volume tile tree”, or VTT, and needs a corresponding viewport rendering solution. NanoVTT delivers this in the form of a GPU-native volume format based on NanoVDB.

As part of this work, the viewport rendering code has been revamped. Volumes in the viewport more closely match Arnold renders by supporting more of Arnold’s features. This includes volumes with voxel colors rendering in the viewport. Fire and explosions can take advantage of physically based thermodynamic emission scaling, a recently released feature of Arnold. Level sets can be assigned a standard surface material for better visualization of levelset data. Volumes now render with an alpha channel in the viewport which is particularly useful for producing playblasts that can be composited.

Finally, the optimizations allow for viewing more total voxels to accommodate larger, more complex simulations without encountering the dreaded “TDR” GPU timeouts. All of this is customizable, allowing you to define volume viewport render settings in the graph to strike the optimal balance between render quality, features, and performance.

MPM Gel

A new “gel” material has been added to the MPM solver. This material can model ice cream, cake icing, toothpaste, ketchup, melted chocolate, foam, and much more. It is customizable using physical properties such as yield stress and viscosity. Gel is integrated with the rest of the MPM system and can be used with influences, fields, and all manners of visual programming.

Enhancements to Property Transfer and Geometry Nodes

In property transfer, low-level components continue to be built to allow the implementation of geometry operations in the graph. These include nodes to transfer from multiple geometries to one geometry (“2D operations”), such as merging meshes or constructing trails from a series of point clouds.

Additionally, you can transfer properties by sampling the original geometry. These “weighted sum” operations can allow operations such as scattering points onto a mesh and sampling the underlying properties or UVs, splitting meshes, and more. These are opening up Bifrost as a no-code geometry-node building platform.

Backdrops and Sticky notes improvements

Sticky notes are now scaled automatically in height to accommodate their content. Various interactions with backdrops and sticky notes have been improved to give you a smoother experience


Contact Us

Contact us on 01 483 410370 or email sales@bluegfx.com.

What’s new in Arnold

Arnold is focused on helping you deliver highest-quality production values and improve pipeline flexibility and scalability.

This update brings you native support for Apple Silicon in Arnold for Maya and an improved workflow for texture files.

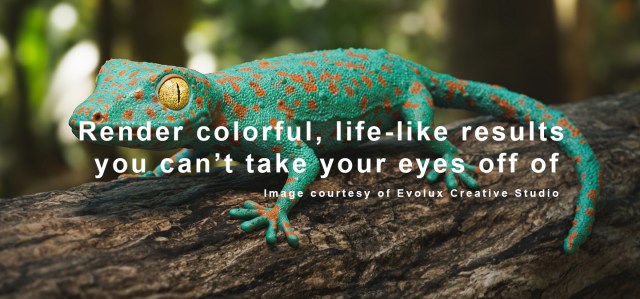
Enhancements to colour management workflows in 3ds Max, better USD and MaterialX support, as well as optimization and bug fixes, empower you to create colourful, life-like renders that leap off the screen.

Deliver highest-quality production values:

You can rely on Arnold to render content faster and more efficiently to meet growing demands. Arnold thrives on heavy data sets and handles complex work with ease, leveraging USD and switching between CPU and GPU rendering to suit production needs.

Improve pipeline flexibility and scalability:

You can seamlessly integrate Arnold with top 3D digital content creation tools like Maya, 3ds Max, Houdini, Cinema 4D, and Katana.

Improve creativity, aesthetics, and quality:

Arnold offers a powerful, easy-to-use rendering experience that delivers beautiful and predictable results, letting you focus on being creative.


What’s new in Arnold


Native support for Apple CPUs in Arnold for Maya 2014

Arnold now natively supports running under Apple M series CPUs, such as the M1 CPU. The Arnold for Maya plug-in is now available as universal binaries, increasing rendering speeds by 20% in selected benchmarks compared to running Arnold in Rosetta emulation mode.

Colour management in Arnold for 3ds Max 2024

Arnold for 3ds Max now fully supports the newly added, colour management workflows in the latest release of 3ds Max. This brings predictable and consistent colours that will match and fit in with the colours in the rest of your pipeline.

When enabled, it relies on built-in, or self-provided, OpenColorIO configuration files. You can now change the default rendering space, define a view transform in the Arnold Render View, and change the input colour space for textures default configuration.

Arnold also now supports the improved OpenColorIO 2.2.1.

USD improvements

This release contains many USD improvements and bugfixes in the USD procedural and the Hydra Render Delegate, helping you better work with heavy data sets. Arnold USD now supports MaterialX displacement shaders in USD scenes and is available both as part of the Arnold plugins and as an open-source project here: https://github.com/Autodesk/arnold-usd.

Improved workflow for texture files

Arnold now enables the automatic generation of optimized TX textures from source textures as part of the rendering process. In this update, the automatic generation is improved and supports using texture files in scenes with different rendering colour spaces. Using optimized textures is critical for rendering speed and memory usage and having the TX conversion as part of the core rendering will help those without a dedicated TX workflow to achieve faster renders.

Other

This update contains improved performance and behaviour for autobump, support for OpenColorIO, faster scene updates, and multiple Arnold API and usability improvements, allowing you to render more quickly.


Buy Arnold

To purchase visit our Arnold product page.


Contact Us

Contact us on 01 483 410370 or email sales@bluegfx.com.

Capabilities in Maya 2024

Produce content faster and raise the bar of high-quality visuals with new capabilities in Maya.

This release brings support for LookDevX, an agnostic material editor that allows you to share materials seamlessly across the pipeline and includes a new, modern, node-based environment for authoring material graphs like USD, MaterialX, and Arnold.

Maya also offers you more artistic control with updates to modelling tools like Retopologize and the Boolean toolset, while animation and rigging updates keep you in the creative zone. These updates and new features are also available in Maya Creative.


Create photoreal scenes with powerful look development tools.

LookDevX

LookDevX is an agnostic material editor that enables standardized, portable material workflows. It allows you to share materials freely and accurately throughout a pipeline and includes a new, modern, node-based environment for authoring a variety of materials like USDShade, MaterialX, and Arnold.

LookDevX Graph

The LookDevX graph is an agnostic material graphing environment that currently supports material editing and authoring of USDshade graphs. Features like compounds, multi-level automatic node zoom, duplicating graphs, dedicated property editor, colour-managed colour pots and colour picker, direct material assignment, authoring UI are just some of available toolsets that will you to handle complex USD workflows.

USD Direct Material Assignment

The Outliner and LookDevX now support the assignment and removal of USD materials to one or more selected Prims in the USD stage. You can create new materials under the “mtl” scope list and control naming using environment variables. Material Subsets are functional and exposed in the USD Stage, but don’t currently support direct material assignment. Additionally, you can add materials to any selected material scope and move materials between scopes.

Attribute editor USD Material Support

The Attribute Editor can accurately compose USD materials with regard to UI groups and attribute names. A dedicated Material tab allows you to easily find and manage materials and shader properties. Custom authored materials and their UI groups are synced and are accurately represented between the LookDevX Property Editor and Attribute Editor.

Outliner USD Material Workflows

The Outliner has been enhanced to enable a comprehensive material workflow for artists. When performing direct material assignment, materials are created under a standardized or user-desired material scope name and are listed with regard to their compound organisation. You can move materials between scopes, add materials directly under your desired scope, and rename or delete selected materials. Multiselected actions are also supported for material assignment and for graphing materials from the Outliner to LookDevX.

Loading USD Material Graphs in to LookdevX

You can easily send USD materials from the Viewport and Outliner to LookDevX for any additional adjustments. Multiselect actions for graphing materials are enabled from the Outliner. You can also organize your LookDevX canvas by loading or clearing one or more selected materials.

Supporting different material libraries

LookDevX supports USD Shade, MaterialX and Arnold graphs giving you the flexibility to use various material libraries. Nodes are clearly illustrated using dedicated icons and prefixes on node types. LookDevX is designed and engineered as an Open Render plugin.

Material authoring workflow

LookDevX is a comprehensive material authoring workflow enabling look development artists to express themselves creatively and give them the ability to experiment with complex shading networks that can used by other artists down the pipeline. You can control minimum and maximum attribute range, customize the UI or selectively hide ports.


Produce high-quality visuals with interactive lighting and rendering tools.

Standard Surface

The Standard Surface shader is now the default shader for new objects in Maya. This offers a better out-of-the-box experience with quick access to a higher quality, physically based, flexible uber-shader that can represent a wide range of looks in the viewport as well as renderers such as Arnold. This includes metals, paint, clay, plastic and more.

Better default lighting in the Viewport

The default lighting in Maya has been improved to give better results with the new default Standard Surface shader. This will enable you to create new objects as well as default materials and lighting more easily. Additionally, new settings have been exposed for tuning default lighting.

OCIO 2.2 Integration

New updates to OpenColorIO 2.2 include several notable features including new ACES configs with improved accuracy and user-experience. Added support for config archives will enable make sending configs between collaborators more reliably. Built-in configs will allow convenient access without the need to download a config.


Create CG assets seamlessly with a robust modelling toolset.

Retopologize Improvements

  • Feature Preservation: Preserve features like hard edges, edges by angle, and user-defined edge Component Tags during the retopologize process. New feature preservation options allow you to maintain specific areas of detail on input mesh and control or guide the resulting edge flow of a retopologized output mesh.
  • Symmetry support: Retopologize meshes that require symmetrical topology using controls for axis and direction, take into account world and object space, as well as orientation and pivot offsets. This is useful for things such as characters and creatures, as well as any hard surface objects that require mirrored topology on two sides, for example, a chair or a mechanical part.
  • Mesh Pre-check: A new option called “Scan input mesh for issues” warns you about potential problems with your mesh or about certain options that may cause undesirable results with a given mesh. Tips will also be provided to help you troubleshoot.

Make Live

  • Multiple object support: Make Live now supports multiple objects at a time and provides visual feedback in the UI to help you identify which objects are live, including colored highlighting in the Outliner. You can target as many objects as you want in the viewport for things like snapping and constraining objects or components, as well as supporting Quad Draw workflows.
  • Quad Draw Improvements: Quad Draw has been updated to work with multiple Make Live objects as well target meshes that have been set to Smooth Mesh preview mode. You can use Quad Draw to create new, simplified geometry on top of more complex collections of target meshes such as full characters that are made up of many individual pieces like clothing, armour, gear, and more.

Unsmooth Mesh

This new feature allows you to reduce the number of subdivisions of any catmul-clark smoothed, high-res mesh. You can now reverse the subdivision of more complex meshes while maintaining the overall shape and volume. This can be useful for creating low-resolution versions of meshes that have been smoothed and subdivided during the sculpting process.

Boolean Toolset

Improvements to the Boolean toolset give modellers more control when adding and editing new input objects in the Boolean Stack. Additionally, a new Interactive Update option provides a way to improve boolean performance while working with complex dense meshes.


Produce life-like performances with modern animation workflows.

Time Slider UI/UX Improvements

The Time Slider and its associated tools have been redesigned to provide a more intuitive and modern experience. This includes improvements to key, waveform and bookmark display, as well as interaction modes for moving and scaling keyframes, setting time ranges and more. You will be able to navigate and manipulate the timeline more intuitively and edit your animations more easily, directly in the Time Slider.

Animation Curve Brushes in the Graph Editor

New brush-based curve editing tools in the Graph Editor let you intuitively shape groups of keys. Using the Grab, Smooth and Smear tools, you can now interactively sculpt and refine the shape of curves to adjust or clean up existing animation. This is particularly useful for working with dense animation curve data such as motion capture or baked simulations.

Key and curve editing utilities

Several new key and curve editing features including offset curves, clamp curves and remove keys let you quickly modify the time and/or value of selected keys, ranges of keys or whole curves.

Interactive Key Scaling Improvements

A new key scaling widget removes the guesswork from the Scale Keys tool by introducing a manipulator as an alternative to the traditional gestural method. It will also display a value for your keys as you drag, or let you enter a percentage directly in the numeric value fields. This makes scaling curves and keys more intuitive and allows animators to control scale with more precision.

Unreal Live Link for Maya

Stream animation data seamlessly between Maya and Unreal 5.1.


Work with precision using enhanced rigging tools.

Reorder Rotation

The new Reorder Rotation feature lets you change the rotation axes of a selected object and also evaluates and shows the likelihood of gimbal lock for each. You change the rotation order of a control after it has been animated or when you don’t want to change the object pose.

Skin Cluster / Component Editor – Multi Skin Clusters

You can now have more than one Skin Cluster on a single piece of geometry, opening the door to many new possibilities for riggers. Artists will have the ability to easily layer deformations like creating a layer for squash and stretch, a layer for kinematic motions, and another for fine details. This also opens up possibilities for alternate weighting for a variety of needs, both technical and artistic.

Paint Skin Weights – Numeric Deformer Weight Visualization

A new Weight Visualization setting in the Paint Skin Weights Tool lets you display weight influence numerically in the Viewport. Animators and riggers can view and edit the influence of weighting on surrounding joints and influences more precisely.

Other Rigging Improvements

  • Rigging Math Nodes: A robust set of math nodes have been added to the suite of utility nodes that riggers can leverage for complex character rigs. This includes nodes such as sin, pi, cos, log, lerp and many more. The nodes allow riggers to combine simple math operations into node graphs that make up complex rig components.
  • aimMatrix and blendMatrix improvements: A new matrix setting has been added to both the aimMatrix and blendMatrix nodes. SpaceMatrix is a set of Pre and Post Matrix floats that multiply inputs and outputs. This will allow riggers to create setups without the need for extra multMatrix nodes.

Artist-friendly updates.

Mac M1 architecture support

Artists on the Mac platform will now be able to run Maya on modern systems with the latest M1 architecture.

Viewport Panel Filter UI

In the Show Menu of the Viewport, menu items are now sorted into categories in alphabetic order. You can also save custom filter presets allowing you to quickly switch between filters in any given viewport to focus on your work.

Hydra for Maya

This first look of Hydra for Maya enables you to use Pixar’s Hydra rendering framework as a viewport inside Maya. This plugin is part of the USD for Maya and is open source. With Storm, you get Hydra’s primary rasterization render engine which is highly scalable, multi-pass and includes OpenSubdiv mesh rendering support. With the render delegate system, you also have the ability to use the renderer of your choice.


Buy Maya

To purchase, visit the Maya product page.


Contact Us

Contact us on 01 483 410370 or email sales@bluegfx.com.

Capabilities in 3ds Max 2024

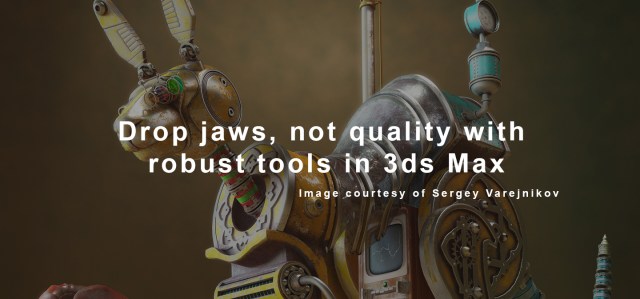
3ds Max brings new capabilities and improvements to modelling, animation, and rendering tools so you can focus on being creative.

The new Boolean modifier offers a modern and intuitive way to produce clean geometry while updates to Array enable you to create beautiful nature-like scenes procedurally.

You can also confidently rely on Colour Management to see colours consistently across the pipeline – from Viewport to final render.

3ds Max continues to add animation improvements to help you bring characters to life.


Build complex designs with robust modelling tools.

Boolean Modifier

Produce clean geometry with a modern and intuitive Boolean modelling workflow in 3ds Max. The new Boolean modifier within the trusted modifier stack enables you to edit and manipulate mesh output with ease and speed. This includes a new Boolean operand called Split as well as Mesh and VDB-based Boolean operations.

Array Modifier

Create beautiful and complex designs procedurally with new features and updates to the Array modifier.

  • Generate spiral-based distribution patterns with the new Array modifier distribution type called Phyllotaxis which works from the centre out and generates natural designs.
  • Assign Material IDs to mesh data on a per-face and per-element basis using new methods like random, ordered, first, middle, and last. Additional controls for N times and Phase are also included.
  • A new “progressive” option in Array’s Transform controls for Radial, Spline, and Phyllotaxis distribution types let’s you alter transform data so you can progressively change from first to last mesh distribution.

Retopology Tools 1.3

Use the latest version of Autodesk ReForm with the Retopology modifier in 3ds Max.

Editable Poly & Edit Poly Modifier

  • Editable Poly and Edit Poly bring improvements to retriangulation of polygonal face data like Face splitting by insertion of edges, Slice, Cut, Bridging, Vertex extrusion, and Edge extrusion.
  • Similar to the capabilities found within Editable Poly, Edit Poly now includes the same automatic retriangulating of polygon faces when a vertex, edge, or face component has been adjusted to cause edges and hidden faces to cross.
  • When performing a Cap option on an Editable Poly or an Edit Poly modifier, the faces that are generated are now also applied to the same smoothing group so you can create beautiful results.

Symmetry Modifier

When a new Symmetry modifier is applied, it will now operate on the X axis by default allowing you to better match the operate to how you create your art content.

Editable Mesh and Edit Mesh Modifier

Improvements to AutoSmooth enable you to achieve better results when performing the operation on an Editable Mesh or Edit Mesh modified object.

Spline Vertex Welding

Enhancements to weld operations of Spline objects enable you to generate complex assets with accuracy. Use the Spline vertex weld operation to bond a destination vertex to your target vertex with better precision and achieve predictable results when performing a Spline Extrude operation on Knot components and edge components.

Faster STL Import

STL, a file format commonly used for 3D printing, can contain millions of triangles of data. You can now load STL files faster with improved performance to the File Import. The STL Import dialog UI also brings enhancements for better efficiency.

STL Check Modifier Processing

Significant performance improvements to the STL Check modifier allow you to perform operations on dense polygonal meshes and objects with greater speed.

Material Modifier

Applying the Material modifier to a Spline object that is renderable via settings of the Spline or the Renderable Spline modifier will preserve it as a Spline object type. The Material Modifier will also now retain explicit normals when applied to a Mesh based object.


Produce high-quality visuals with interactive rendering tools.

Colour Management

Effective colour management tools built around the Academy Color Encoding System (ACES) and OpenColourIO (OCIO) are a must for today’s modern pipeline for Film and TV production. You now have complete control over colors with Color Management in 3ds Max. From input to output, the viewport to final render – colours will be predictable and consistent, giving you the confidence that colours will match and fit in with the colours in the rest of your pipeline.

Compound Notes

Managing complex shader graphs can be difficult due to the large number of nodes and connections that can be employed. With Slate Material Editor (SME) Compounds, you can collect any number of graph nodes into a single compound representation in the Material Editor, enabling a method to reuse a collection of nodes in other shaders and simplifying the representation of this data.

Material Switcher

The Material Switcher is a new node in the Material Editor that enables a simple control method for you to manage the display of multiple material variants that can be applied to objects and USD data in your 3ds Max scene. It will allow you to organize and store thousands of materials in one convenient Switcher material. You will also be able to swap the assigned shader of your objects easily and quickly. These changes will be updated in the viewport and your render.

Slate Material Editor

The Slate Material window has been improved using QT, a cross-platform software for creating graphical user interfaces. The window can now be docked anywhere inside the 3ds Max UI, letting you optimize and customize the interface the way you like.

Additional updates have been added such as a new SME Element under the Colors preferences that gives you total control over how the different maps and materials appear in the SME. An option to draw the connecting wires behind nodes has been introduced, helping you keep your shader graph cleaner and more readable.

MaxtoA

MaxtoA and Arnold now support Color Management workflows if you choose OCIO mode inside of 3ds Max.

  • Arnold now enables the automatic generation of optimized TX textures from source textures as part of the rendering process. Using optimized textures is critical for rendering speed and memory usage and having the TX conversion as part of the core rendering will help users without a dedicated TX workflow to achieve faster renders.
  • Arnold and the Arnold Render View have been updated to work with Color Management in 3ds Max 2024.
  • MaxToA now passes all color information from 3ds Max to Arnold for rendering by handing over the entire OCIOconfiguration for rendering.

Seamless workflows with USD 0.4.0.

USD Export SDK

Plugin developers can now wrap USD Export extensions into a context that consolidates all the necessary settings for the plugin to properly run. You can choose which plugins are being used at export-time. This helps you better control how the plugin works when exporting data reduces the checkboxes to check when exporting USD with specific plugins.

USDSkel Support

The USD Exporter now supports exporting Skin modifiers into USDSkel. There are preferred when re-using skeletal animations across many characters, scenes, and projects. USDSkel creates much smaller USD files than vertex animations.


Bring characters to life with enhanced animation capabilities.

Transform List Controller

The Transform List allows for multiple Transform controllers to be added to an object as layers of blended animation data. A new method enables you to easily refine and iterate upon your work through unique animation data for each layer and controls how and when the layer of data can blend together.

  • Mix Transforms: Previously, only nodes could have a transform controller. With the Transform List, you can now blend node transforms directly without additional scripting or complexity.
  • Isolate Isolation: You can now choose to iterate on options and edit list entries in isolation for better control.

Updates to Motion Paths

Motion Paths now support a larger set of position controllers enabling animators to have a wider range of support to manipulate animation data directly in their viewport.


Artist-friendly updates.

Mesh & MNMesh Changes

Experience improved stability and performance gains with an updated. The internal structure of Mesh and Poly data has been updated to offer improved stability and performance gains.

Search in the Modifier List

Navigate, find and apply your desired modifier with a new search capability in the Modifier List. You can now type in the modifier you want to apply to filter a search to those results.

MAXscript Improvements

Based on community requests, improvements to MAXScript include an option to not show scripts on error, the ability to enable/disable change handlers via code, the ability to set a spinner control scale at runtime, and other small changes.

Substance and ATF

Substance comes installed with the latest version of 3ds Max. NX import now supports NX 2206.

Revit/Inventor Importer

The RCE and Inventor Server installers have been removed from the initial download bringing a faster install experience. They will remain downloaded from your account portal or included in deployments. They will also install when you attempt to import this type of data into 3ds Max when needed.


Buy 3ds Max

To purchase visit our 3ds Max product page.


Contact Us

Contact us on 01 483 410370 or email sales@bluegfx.com.
Bluegfx Welcomes Hammerspace

Bluegfx is delighted to be working with Hammerspace, a ground-breaking technology that is transforming the way the visual effects, animation and post-production industries approach storage and data management.

Hammerspace has the potential to revolutionise the industry by streamlining the production process and freeing up valuable time and resources for creative endeavours.

It can be deployed to drive the need for remote workforces, metadata-driven workflows, hybrid cloud storage and burst render, maximising your usage of personnel and varied infrastructure worldwide.

It is fully integrated with Autodesk ShotGrid and many other industry standard creative tools and is already adopted by many studios worldwide including, Jellyfish Pictures and Mathematic Studios .


Find out more

Check out our Hammerspace product page for more info.

Visit: Why Hammerspace? 


Contact Us

Contact us on 01483 410370 or email sales@bluegfx.com.
Simple Animation

In the Media & Entertainment industry, there is an ever-increasing need for remote deployment of people and infrastructure.

If you need a remote working studio environment and are looking for business continuity, you should take a look at the virtualised platform from Simple Animation. Designed specifically for the visual effects, games and design visualisation markets, their cloud-based platform lets you create and manage your digital content creation in a secure cloud environment. You can scale easily and reduce your overall long-term costs, maximising the flexibility of your budgets and only paying as you need to.

It fully supports all the typical software tools that you use including Adobe, Autodesk, Chaos and many more, check out this short video that explains how simple it is:

Powered by IBM Cloud, facilitating connectivity to remote teams located anywhere; you can be operational quickly and easily, all you need is a thin client and internet access to connect to powerful virtual workstations and it only takes about an hour the first time to set up your studio or project.

Business continuity is critical, SimpleCloud solutions provide you with a simple and flexible cloud-based platform, where you will instantly access powerful virtual machines and share secure projects and workflows with colleagues around the world.


Contact Us

To find out more about purchasing a Simple Animation subscription or to arrange a virtual demonstration contact a member of our sales team. Call us on 01483 410370 or email sales@bluegfx.com.

V-Ray 6 for SketchUp

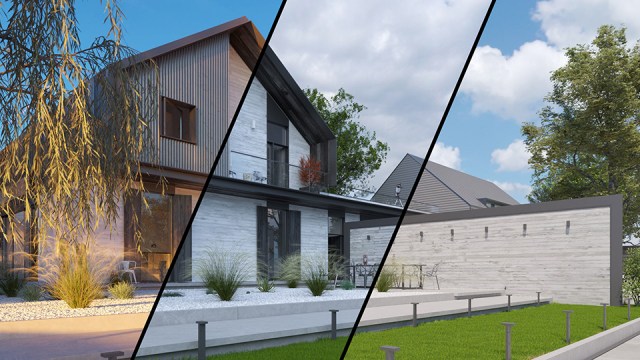
When you’re ready to create photorealistic renderings and animations, V-Ray does it all. And now, V-Ray 6 for SketchUp lets you do even more.

Powerful new tools let you create detailed geometric patterns and beautiful custom skies. New and improved materials boost rendering speeds and realism, and cloud collaboration and Enscape compatibility bring teams together like never before.

Next level collaboration

V-Ray and Enscape compatibility – Introducing the most powerful visualization workflow in the AEC industry. With V-Ray 6, you can transfer your real-time scenes from Enscape and continue building on your work to take it to the highest possible level of photorealism. With support for Enscape materials, lights and compatible 3D models, V-Ray ensures that all design decisions are kept throughout the project. No dead ends. No starting over. A fast and easy design process.

Chaos Cloud collaboration – Share your work and collaborate with internal and external stakeholders on the cloud. With Chaos Cloud Collaboration you can upload your images and image panoramas straight from the V-Ray Frame Buffer and significantly speed up the approval process. 

For the full list of V-Ray 6 for SketchUp improvements, check out Chaos’ documentation page > .

V-Ray 6 for Rhino

V-Ray 6 enables you to take advantage of powerful new ways to collaborate with colleagues and clients. Now, bring an Enscape scene inside V-Ray and take it to photorealism. Share your work and get feedback with Chaos Cloud Collaboration. Add custom clouds and create breathtaking time-lapses with the new procedural cloud system. Create more complex and more realistic materials with just a few clicks. And more. 

 Next level collaboration

  • V-Ray and Enscape compatibility – Now, you can take your real-time Enscape scenes into V-Ray’s photorealistic rendering engine and unlock AEC’s most powerful visualization pipeline. We’ve worked together to ensure Enscape 3D models, lights and materials are fully supported by V-Ray, so your projects develop smoothly with effortless collaboration between designers and visualization specialists.
  • Chaos Cloud collaboration – Get feedback the easy way with Chaos Cloud Collaboration. Share your images and panoramas directly from the V-Ray Frame Buffer to colleagues and clients anywhere in the world.

For the full list of V-Ray 6 for Rhino improvements, check out Chaos’ documentation page > 


Buy V-Ray 6 for Sketchup

To purchase visit the product page here.

Buy V-Ray 6 for Rhino

To purchase visit the product page here.


Contact Us

Contact us on 01483 410370 or email sales@bluegfx.com.
Adobe Substance 3D

Empower your creative team to take their ideas further. 

From designing to 3D prototyping to sharing creations across multiple formats and platforms, the Adobe Substance 3D Collection offers a state-of-the-art, end-to-end* workflow for Creative Professionals. The intuitive features enable designers to easily model, texture, stage and publish 3D content. You can also bolster your team’s 3D expertise by leveraging our brand-new Adobe Substance 3D Learn online videos and strengthen your in-house capabilities.* Modeler currently in Private Beta

Get started with ready-to-use parametric assets.
Experiment with ready-to-use parametric models, lights, materials, and environments. Explore and use thousands of high-end assets made by 3D specialists and world-class guest artists – all of which are included within the Substance 3D Collection plan. Plus, with modifiable parameters, there are infinite variations.

Integrate Substance effortlessly.
Substance allows you to have one unified parametric material library across all your apps. The non-destructive workflow seamlessly integrates not just with Creative Cloud apps but also with all major third-party 3D software in the market.


Contact Us

Contact us on 01 483 410370 or email sales@bluegfx.com.

Autodesk Announce Maya Creative

Maya Creative offers modelling, animation, and rendering tools for artists and teams looking to scale up their workflows or access professional tools.

Unlike Maya, Maya Creative comes without API access and the extensibility needed for larger production workflows and will only be supported on Windows and Mac.

The Bifrost plug-in will be available on Maya Creative as read-only.

Customers can only access Maya Creative with Flex, a pay-as-you-go option for daily product use. 


Compare

Compare the features of Maya v Maya Creative.


Contact Us

Contact us on 01483 410370 or email sales@bluegfx.com.

V-Ray for Maya 6 has been released

V-Ray 6 for Maya packs in a number of powerful, new tools that enable users to create without limits. They can now generate complex surfaces for stunning close-up shots at no extra memory cost. Craft just the right sky for their environment in just a few clicks.

Take their product design and HDRI renders to the next level, and more. With V-Ray 6, users can also make use of Chaos Cloud Collaboration to fast-forward their projects’ reviews and approvals, as well as easily monitor and manage rendering performance with V-Ray Profiler. Plus, they can experience a number of other workflow enhancements including identical results from IPR and the production renderer, enhanced USD support, faster and more efficient rendering, background Chaos Cloud Rendering submissions and much more.

Key features in V-Ray 6 for Maya

Create without limits.  Powerful, new tools allow you to build anything imaginable.

V-Ray Enmesh. Create complex surfaces with lots of detail for stunning close-up shots. With Enmesh, you can repeat geometry across the surface of an object at no extra memory cost. Start treating geometry like a texture, creating intricate chain mails, car grilles, metal grids, panels, fences, fabrics, and so much more.

Finite Dome light mode. Elevate your product design and HDRI environment renders with the new, more flexible ground projection capabilities of the V-Ray Dome Light. Set the scale of your light, and have full control over blend settings with the new Finite Dome mode.

Procedural clouds. Craft just the right cloudy sky for your environment in just a few clicks with V-Ray Sun and Sky’s new procedural clouds system. No need to settle for a static HDR or a cloudless sky. Now you can easily simulate a variety of cloud types and weather conditions, from partly cloudy to overcast. Render realistic stills or dynamic time-lapses.

V-Ray Decal with Displacement. You can now use V-Ray Decal to add displacement to any surface for even more realistic cracked walls, rocks, scratched and rusty surfaces, embossed lettering, and more.

Streamline your workflow. Fast-forward your project’s reviews and approvals.

Chaos Cloud Collaboration. Get rapid, consolidated feedback on your work’s progress. Upload your renders to Chaos Cloud Collaboration right from V-Ray’s Frame Buffer, and share your work with colleagues and clients to add comments and annotations, see panorama views and more — from anywhere in the world.

Easily monitor and manage rendering performance, and so much more.

V-Ray Profiler.  Get reports on the time spent calculating shaders and volumes in your scenes. Locate all hot spots in your scene and optimize pipelines for even faster rendering. Pair V-Ray Profiler with the Memory Tracker, and you now have everything you need to monitor and optimize your projects.

Light Cache in IPR. Make better decisions while iterating on your designs with V-Ray’s Interactive Production Renderer (IPR) output now being identical to the production renderer.

Background Cloud Cloud submissions.  You now have uninterrupted access to Maya when submitting to Chaos Cloud Rendering, so you can continue working.

Enhanced USD support. Experience a USD workflow that’s smoother than ever. We’ve added support for the latest MayaUSD version as well as included new enhancements for OpenVDB volumes and V-Ray material exports, promoting an easy exchange with Solaris and USD-powered pipelines.

Faster rendering.  V-Ray Environment Fog now renders up to 30% faster. Translucent material rendering is also up to 2x faster thanks to V-Ray Material’s brand-new Illumination mode. Plus, scenes featuring thousands of instances now render more efficiently.

Shade faster and better. Speed up shading and create even more physically accurate materials.

Thin Film layer.  Create realistic soap bubbles, oil spills and more with the new Thin Film option available in the V-Ray Material.

Enhanced V-Ray Material energy preservation. Render even more physically accurate rough metals and other reflective surfaces with enhanced V-Ray Material energy preservation.

Composition Guides Layer in VFB. Fine-tune your scenes’ compositions without going to a separate application. With customizable overlays, the new composition guides layer in the VFB allows you to easily experiment and enhance your image compositions.

VFB Panorama Viewer.  Now you can preview your spherical panorama renders while rendering, right from your V-Ray Frame Buffer.

What’s new

 V-Ray is the renderer that does it all, allowing users to create without limits. No need to switch applications and interrupt your creative process. Users can easily create complex surfaces with lots of detail for realistic close-up shots at no extra memory cost.

V-Ray 6 speeds up shading and allows users to create even more physically accurate reflective materials.

V-Ray 6 for Maya also enables users to easily monitor your scene’s shaders and volumes rendering performance and locate hot spots for optimization.

You now have a fast and efficient way to share your renders, collect feedback and collaborate with your team or customers. You can also create custom skies for their environments in just a few clicks and render powerful timelapse videos.

V-Ray 6 introduces a number of enhancements that streamline users’ workflows, including consistent results between IPR and the production renderer, enhanced USD support, faster and more efficient rendering, and more.

V-Ray 6 adds even more functionality to the V-Ray Frame Buffer and enables you to further streamline your workflow and make better decisions as you review your work.

Users can now render with V-Ray in any host application and benefit from the powerful suite of Chaos products and services with just a single license.


Buy V-Ray for Maya

To purchase visit the product page here.


Get in touch

Contact us on 01483 410370 or email sales@bluegfx.com.
Let's Talk

Got a project in mind?

Call us for a chat today

on 01483 410370 or email

sales@bluegfx.com

to find out how we can help!

Contact our Support Team

Call 01483 410370

or email support@bluegfx.com

    Keep on top of this evolving industry by signing up to the Bluegfx newsletter